Showing posts with label pies. Show all posts

Thursday, December 19, 2019

Cranberry Lime Tart


I may be the last one in the world to make this pie!  After appearing on the cover of Bon Appetit in the fall, it took the baking world by storm.  I'm sure it appeared on many a Thanksgiving table!  But, in all honesty, it didn't appeal to me.  Cranberries and lime just sounded too tart so I dismissed it. 


Then, thankfully, along came our holiday gourmet group menu, hosted by friends last weekend.  Guess who was assigned this recipe?  Yep.  All I can tell you is, Thank Goodness!  It is absolutely delicious and the cranberries and lime juice are mellowed into a delicious curd with plenty of sugar, butter and eggs to take the 'bite' out of the cranberries.  And, the gingernap/pecan crust is to die for.  It is the most perfect compliment to the curd and delivers a playful crunch in every bite. 


I increased the recipe by half and used one large (9-1/2 inch) and one small (7-inch) tart pan in order to serve 10 and have some left over.  Topped with sweetened whipped cream, sugared cranberries or a sprig of fresh thyme, this needs to be on your Christmas dinner table! 


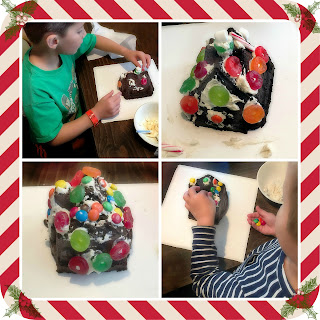
Speaking of sweetness, we've been enjoying our grandsons this past month decorating Gingerbread houses, visiting our local indoor botanical garden's holiday display, and outdoor adventures and sleepovers.  We love to have them over individually to love and spoil them ♥ We have been so blessed with these three, wonderful boys. 


More sweetness was gifted to me by my dear cyber friend of 20+ years, Monique, of La Table de Nana and @monique_qc on Instagram.  Among other goodies, she sent this beautiful hand-stitched cardinal and two beautiful paintings (the tree was painted on the craft paper in which the package was wrapped.  How stickin' cute is that? 

This likely will be my last post before Christmas and I want to wish each and every one of you peace and happiness this holiday season.  Thank you all for being so supportive to me and my humble little blog all of these years. 


Savoring Time in the Kitchen is a member of the Amazon Affiliate Program. If you purchase a product by following a link that we provide, the price you pay as a consumer does not change, but if you do make a purchase through one of these links, we earn a very small commission for providing that link. Thank you for your support of Savoring Time in the Kitchen!

Cranberry Lime Tart

Printable Recipe

Please see my note about the amount of time required to thicken the curd below:

Crust
4 ounces gingersnap cookies (about 16 if using Nabisco)
1 cup pecans
4 tablespoons unsalted butter, melted
3 tablespoons light brown sugar

Filling
1 12-ounce package fresh (or frozen, thawed) cranberries, plus 4 ounces (about 1¼ cups) for serving
2½ cups granulated sugar, divided
3 large eggs
2 large egg yolks
1 teaspoon finely grated lemon zest
2 teaspoons finely grated lime zest, divided
½ cup fresh lime juice
Pinch of kosher salt
¾ cup (1½ sticks) unsalted butter, room temperature, cut into pieces

Whipped cream (for serving)

To Make The Crust

Preheat oven to 350°. Pulse cookies in a food processor until very finely ground (you should have about 1 cup). Add pecans; pulse until finely ground. Add butter and brown sugar; pulse to combine. Transfer to a deep 9" pie dish. Using a measuring cup, press firmly onto bottom and up sides of dish. Bake until firm and slightly darkened in color, 10–15 minutes. If crust slides down sides, gently press back up. Let cool. Crust can be baked 1 day ahead. Store tightly wrapped at room temperature.

Filling

Bring 12 oz. cranberries, 1 cup granulated sugar, and ¼ cup water to a boil in a large saucepan over medium-high. Reduce heat; simmer until cranberries burst and most of the liquid evaporates, 12–15 minutes. Let cool. Purée in a blender until very smooth.

Cook purée, eggs, egg yolks, lemon zest, lime juice, salt, ½ cup sugar, and 1 tsp. lime zest in a heatproof bowl set over a saucepan of simmering water (bowl should not touch water), stirring with a rubber spatula and scraping down sides of bowl often, until curd thickens and coats spatula, 8–10 minutes. (NOTE:  On my stove this process took at least 20-25 minutes, so go to the bathroom before you start stirring - LOL). Cool until still warm but not piping hot.  It needs to be warm enough for the butter to melt in the next step. 

Using an electric mixer on medium-high, beat curd, adding butter a piece at a time and incorporating after each addition, until curd looks lighter in color and texture, about 5 minutes. Scrape into crust and chill until firm, about 2 hours.

Garnish

Bring ½ cup granulated sugar and ½ cup water to a simmer in a small saucepan over medium heat, stirring to dissolve sugar. Add remaining 4 oz. cranberries and cook until barely starting to soften, about 1 minute. Using a slotted spoon, transfer cranberries to a wire rack set inside a rimmed baking sheet. Chill until no longer sticky, 20–30 minutes.

Toss remaining ½ cup granulated sugar and 1 tsp. lime zest in a small bowl. Toss cranberries in lime sugar. Top pie with cranberries; serve with whipped cream.

Do Ahead: Pie (without topping) can be made 2 days ahead. Cover once filling is firm and keep chilled. Let sit at room temperature 2 hours before serving.

Adapted from Bon Appetit Magazine

Thursday, May 31, 2018

Strawberry-Rhubarb Tart with Sweet Walnut Crust


Many of you may have seen all of the new privacy policies flooding into your inbox lately regarding the new European Union guidelines.  If you are a visitor from a European Union country, please see my updated Privacy Policy at the top of the page under my title and photo header.  My privacy policy is meant to comply with the EU General Data Protection Regulations called GDPR.  If you disagree with the guidelines you may always opt out of receiving my subscription emails by using the Unsubscribe link at the bottom of the my 'new post' emails at any time in the future.  I deeply value my subscribers and viewers and want you to have a pleasant experience when you visit.  

I have also finally converted my blog to https which is more secure.  It took a long while to figure out where the hidden http links were in my template and remove them, but I think I have it finally figured out and uploading is much faster now.  


Now that I have that piece of business out of the way, let's talk about this delicious strawberry-rhubarb tart, and the amazing sweet walnut pastry crust!

This beautiful spring-time tart was almost a disaster as the original recipe only called for 2 tablespoons of potato or cornstarch to bind it together (it didn't happen), but a little tweaking with the addition of unflavored gelatin, it turned into a tart that held together beautifully and tasted wonderful!


The best way to serve this tart is with a dollop of crème fraîche or sour cream.  You can find my post on how to make your own homemade crème fraîche (which is a lot cheaper than store bought!) by clicking here.


The sweet walnut crust alone is worth trying, even if you don't care for rhubarb desserts.  I can imagine so many delicious fillings in this pastry!  Chocolate would be my first choice :)  I think I foresee a post on that coming up!


It was an unusually hot Memorial Day weekend for the Midwest...90's farenheit with even hotter 'feels like' factor!  I seems like we went from winter, to monsoon season and then to mid summer in the month of May! Many of my early spring irises and Lily of the Valley flowers were roasted during the heat and sadly didn't last too long.  How has your weather been?

Strawberry-Rhubarb Tart in a Sweet Walnut Crust

Printable Recipe

Makes one 9-1/2 to 10-inch tart

Sweet Walnut Pastry (recipe below)

¾ cup sugar
Juice and grated zest of 1 large or 2 small oranges (4 tablespoons zest)
1 pound fresh rhubarb, trimmed and cut into 1-inch lengths
2 tablespoons unsalted butter, room temperature
2 tablespoons orange liqueur
2 tablespoons potato starch (I used corn starch)
2 pints red ripe, strawberries, hulled and sliced
2 packages unflavored gelatin, sprinkled over 1/3 cup cranberry or apple juice (or water)
½ cup strawberry preserves, heated until barely runny and strained
Crème fraîche or sour cream for garnish

For the walnut crust:

2 oz. (1/2 cup) finely chopped walnuts (food processor), toasted
6 oz. (12 Tbs.) butter, slightly softened
2 oz. (1/2 cup) confectioners’ sugar
1 large egg
7-3/4 oz. (1-3/4 cups) flour

Preheat the oven to 400F.

Using an electric mixer with the paddle attachment, beat the butter and confectioners’ sugar at high speed until light and fluffy. Add the egg; mix to combine. Lower the speed to slow and add the flour, mixing until barely combined. Add the walnuts and continue mixing, scraping the sides of the bowl, until the dough comes together. Divide the dough. Wrap the half you’ll be using in plastic and refrigerate for at least 2 hours or overnight. Wrap the other half well in plastic and then in foil and freeze for future use.

Lightly oil a 9-1/2-inch tart pan or use a non-stick tart pan.

On a lightly floured surface, roll the dough into a round about 1/8 inch thick. Arrange it in the tart pan, trimming to fit. Line the crust with foil or kitchen parchment and weight with beans, pie weights or a smaller oven-safe pan that will fit inside.

Bake until the edge is light golden brown, about 20 minutes. Carefully remove the beans and foil and bake until the bottom is dry and light brown, about another 5 minutes. Cool to room temperature.

To Make the Filling:

Bring sugar, orange juice and zest to a boil in medium, heavy-bottomed non-reactive pot. Add rhubarb and return to a boil, shaking occasionally so rhubarb cooks evenly, but without stirring, which will break it up. Reduce heat and simmer 10 minutes, or until rhubarb is soft. Add butter and shake to combine.

Whisk together liqueur and potato starch until smooth and stir into boiling liquid. Cook until mixture is clear and thickened, about 2 minutes. Fold in half the strawberries, remove pan from heat.

In a glass measuring cup, add 1/3 cup fruit juice or water. Sprinkle the 2 envelopes of unflavored gelatin over the top of the liquid and allow to sit for 1 minutes. Then microwave the gelatin mixture on high for about 30-40 seconds, stirring once. Then pour the hot gelatin over the hot fruit mixture and carefully fold the gelatin mixture and fruit mixture together until well combined. Allow to cool slightly.

Spoon filling into crust and top with remaining strawberries. Brush strawberries with preserves to make a shiny glaze and chill tart until set, about 2 hours. If you have leftover filling, you can put it in a small dish and refrigerate and enjoy on its own.

Serve topped with crème fraîche or sour cream.

Wednesday, July 12, 2017

Rhubarb and Strawberry Pie with Almonds


Hello! How's your summer going?  My little rhubarb patch has been going strong since spring (probably due to all the cool, rainy days we've had) and I may be able to get a few more stalks before I need to give it a rest for the remainder of the summer so it comes back next spring in good health.  A good rule of thumb is that when the stalks start getting thin you should stop picking.


I adapted this recipe from my ages-old Betty Crocker cookbook.  It's the very first cookbook I owned and was given to me by my late sister ♥  I added some strawberries and decided to sprinkle the top of the pie with sliced almonds and a little Swedish Pearl Sugar before baking - a delicious combination!  I love the added crunch the almonds give to the pie.


Sadly, rhubarb season and my peas may be ending but Clematis season in my garden is at its peak. Tomatoes and zucchini will be arriving soon, if it ever stops raining. Has anyone else been getting tons of rain this summer? We had almost 2" or rain last night into this morning!


Rhubarb-Strawberry Pie with Almonds


Printable Recipe
Makes one 9" pie (amounts for 8" pie in parentheses)

Rhubarb-Strawberry Filling

1-1/3 (1) cups sugar
1/3 (1/4) cup all-purpose flour
4 (3) cups diced fresh rhubarb
1 (1/2) cups diced fresh strawberries
1-1/2 (1) tablespoons butter

3 (2) tablespoons sliced almonds, for garnish
Swedish Pearl Sugar or regular baking sugar, for garnish

2 crust pastry (recipe follows) or you may use store-bought refrigerated pie crusts

Preheat oven to 425F

Place rhubarb in a large bowl. Mix sugar and flour together and add to rhubarb in bowl. Toss together with rhubarb.

Pour rhubarb mixture into a pastry-lined pie plate and dot with butter. Cover with top crust and make slits in dough. Flute crust edge with your fingers or score with a fork to seal. Sprinkle top with almonds and sugar.

Bake for 40-50 minutes until crust is nicely browned and juice begins to bubble through slits. Cover edge of pastry with strips of aluminum or use a silicone pie crust shield during the last 20 minutes to prevent burning.

Serve warm or at room temperature.

Pastry for a 9" Two Crust Pie (8" pie amounts in parentheses)

2 cups (1-1/2) cups all-purpose flour
1 teaspoon (3/4) teaspoon salt
2/3 (1/2) cups shortening (such as Crisco)
1/4 (3 tablespoons) cold water, more or less

Measure flour by dip and level method and place in large bowl. Add salt and blend. Cut in shortening with a pastry blender until the consistency is like small peas.

Sprinkle flour mixture with water, 1 tablespoon at a time, and mix with a fork until all flour is moistened. Bring dough together with your hands and press into a ball. Cut into two pieces and form into discs.

On a lightly floured surface roll out dough, one piece at a time, covering unrolled piece with plastic wrap until ready to roll out. Roll pastry about 1-inch larger than the pie plate's largest diameter, about 1/8-inch thick. Fold pastry in half and transfer to pie plate. Unfold and press into place. Fill and cover pie with second piece of rolled dough and follow directions above finishing and baking.

Adapted from "Rhubarb Pie' in my vintage Betty Crocker Cookbook.

Thursday, December 10, 2015

Lemon Tart with Pine Nut Crust


My favorite desserts are chocolate and lemon.  Usually chocolate takes precedence, unless it's a REALLY good, REALLY lemon-y dessert.  Let me tell you, this one ranks in the top five all-time lemon desserts I've ever made and it could possibly be number one! 


The silky, lemon sabayon filling is wonderful and the sweet pine nut crust is a unique and delicious compliment to the tartness of the lemon.  Perfection, I tell you! The pine nut crust can even be made a day in advance and the lemon sabayon the morning you'd like to serve this dessert.  


The most time-consuming part of making this dessert is making the sabayon.  If you have a little patience and 15 minutes to devote to stirring,  it is well worth the effort.  The sabayon is slightly caramelized under the broiler after filling the tart, similar to a crème brûlée .  You can top it with whipped cream or plain raspberries, as I did. 


I don't often make dessert for my husband and myself.  But when we're invited to a dinner party I enjoy offering to bring dessert and try to make a little extra for us. The bonus mini tarts were refrigerated and enjoyed the next day ;)


If you know someone who is a lemon lover you need to make this for them.  It will knock their Christmas Stockings off :)

Christmas baking has just begun here.  I bought myself an early Christmas baking gadget a month ago and purchased this adorable Nordic Ware Gingerbread House pan.  


I also received a beautiful copper Christmas tree cookie cutter recently as a gift so made a few of my favorite gingerbread cut-outs and decorated them with royal icing. The moose in the background was a gift my my daughter that she purchased in Jackson Hole, WY on a ski trip. You can find my very own gingerbread recipe here and royal icing recipes here.  It's a little milder than most and goes over well, even with my grandsons who helped me decorate my first gingerbread cakes from my new cakelet pan :)  Not too bad for 3 and 6-year-old boys ♥.


Savoring Time in the Kitchen is a member of the Amazon Affiliate Program. If you purchase a product by following a link that we provide, the price you pay as a consumer does not change, but if you do make a purchase through one of these links, we earn a very small commission for providing that link. Thank you for your support of Savoring Time in the Kitchen!


Lemon Tart with Pine Nut Crust

Printable Recipe

Makes 8-10 servings

Make the Pine Nut Crust first...

Ingredients for the Lemon Sabayon:

3 large eggs, cold
3 large egg yolks, cold
1-1/8 cups sugar
3/4 cup fresh lemon juice (about 3 large lemons)
9 tablespoons (4-1/2 ounces) cold butter, cut into 6 pieces
Ingredients for the Pine Nut Crust:

This is 1/2 the original recipe and makes enough dough for one 9-10 inch tart pan plus another 6 inch or two mini 4 inch tart pans.

Butter and flour for the tart pan
1 cup pine nuts (5 oz)
1/4 cup granulated sugar
1-1/2 cups all-purpose flour
8 T (4 ounces) unsalted butter (I used salted), room temperature
1/2 large egg (I break an egg into a small bowl, whisk briefly to combine white and yolk and measure out 1/8 cup, which equals 1/2 egg)
1/2 teaspoon pure vanilla extract
To make the pine nut crust:
Place the pine nuts in a food processor and pulse a few times. Add the sugar and flour and continue to pulse until the nuts are finely ground. Transfer the mixture to a large bowl.

Add the butter, egg, and vanilla extract and mix to incorporate all the ingredients (the dough can be mixed by hand or in a mixer fitted with the paddle attachment). Wrap dough in plastic wrap and refrigerate for at least 30 minutes. (Dough can be frozen, wrapped well, for up to 1 month.)

Preheat the oven to 350°F. Generously butter and flour a 9-inch fluted tart pan with a removable bottom and refrigerate it while the oven preheats. I used a non-stick tart pan so skipped this step.

Remove the tart pan from the refrigerator. Use your fingertips to press the chilled pine nut dough evenly over the bottom and up the sides of the pan. Trim off any excess dough.

Bake the crust for 10 to 12 minutes, then rotate it and bake for another 10 to 12 minutes, or until it is golden brown. Remove the crust from the oven and let it cool while you make the filling. Don't worry about small cracks. May be made 1 day ahead.

To make the lemon sabayon:

When ready to start the lemon sabayon, have the lemon juice and butter ready by the side of the stove.

Bring about 1 1/2 inches of water to a boil in a pot that is slightly smaller than the diameter of the bowl you will be using for the sabayon. You don't want the bowl to touch the boiling water beneath. I used a double boiler.

Meanwhile, in the bowl you will be using over the boiling water, whisk the eggs, yolks, and sugar for about 1 minute, or until the mixture is smooth.

Set the bowl over the pot and, using a large whisk, whip the mixture while you turn the bowl (for even heating). After about 2 minutes, when the eggs are foamy and have thickened, add one-third of the lemon juice. Continue to whisk vigorously and, when the mixture thickens again, add another one-third of the lemon juice. Whisk until the mixture thickens again, then add the remaining lemon juice. Continue whisking vigorously, still turning the bowl, until the mixture is thickened and light in color and the whisk leaves a trail in the bottom of the bowl. The total cooking time should be 10 to 15 minutes, possibly less, depending on your stove.

Turn off the heat and leave the bowl over the water. Whisk in the butter a piece at a time. The sabayon may loosen slightly, but it will thicken and set as it cools. Pour the warm sabayon into the tart crust and place the pan on a baking sheet.

Preheat the broiler. While the sabayon is still warm, place the tart under the broiler. Leaving the door open, brown the top of the sabayon, rotating the tart if necessary for even color; this will take only a few seconds, so do not leave the oven. Remove the tart from the broiler and let it sit for at least 1 hour before serving. Serve at room temperature or cold.

Adapted from Epicurious, Courtesy of Bouchon Cookbook

Monday, October 19, 2015

Apple, Pear and Cranberry Tart


This easy-to-make upside down tart, or tarte tatin, is the essence of fall with apples, pears and cranberries in a deliciously different pastry crust.


The tart is prepared in an oven-proof skillet with a layer of caramelized brown sugar, butter and spices at the bottom and a delicious oat and butter crust on the top.  After baking, it is flipped upside down onto a plate so the caramel layer coats the filling mixture for a delicious and not too heavy dessert.  Vanilla ice cream would be a great addition!


The recipe says to serve warm but it was just as good after a night in the refrigerator.  We loved it!  The crust was a delightful surprise and I could have eaten the whole thing if my husband hadn't beat me to it.


We had our first freeze this past weekend.  With the temperatures reaching the 70s today through Wednesday we are officially having Indian Summer.


Speaking of Indian Summers is anyone else watching the PBS series? I'm enjoying it very much. The cast is wonderful!   

Apple, Pear and Cranberry Tart


This easy to make upside-down tart or tarte tatin in French, uses the best that autumn has to offer and the crust is delicious! See My Notes below.

8 servings

Crust

1 cup white whole-wheat flour
1/2 cup old-fashioned rolled oats
1 tablespoon granulated sugar
1/2 teaspoon salt
4 tablespoons cold butter, cut into small pieces
2 tablespoons canola oil
3 tablespoons ice water

Filling

2 ripe but firm pears, peeled and thinly sliced
1 large apple, peeled and thinly sliced
1 tablespoon lemon juice
1/2 cup light brown sugar
2 tablespoons butter
1 teaspoon ground cinnamon
1/2 teaspoon ground ginger
1 cup fresh cranberries

To make the crust:

Put the flour, oats, granulated sugar and salt in a food processor and process until the oats are finely ground. Add the butter, a piece at a time, and pulse two to three times after each addition, until blended. Add the oil and water and pulse only until the dough starts to come together. Put the dough on a lightly floured surface and knead it a few times until it holds together. Pat the dough into a 5-inch disk and wrap in plastic or wax paper.  Refrigerate while the filling is prepared.

Preheat oven to 375°F.

To make the filling:

Toss the pear and apple slices with lemon juice in a large bowl.

Put the brown sugar, butter, cinnamon and ginger in a 10-inch ovenproof skillet and cook over medium-low heat, stirring, until the butter and sugar are melted and the mixture starts to bubble. Remove from heat. Arrange the pear and apple slices in concentric circles, starting at the center and work outward, overlapping the slices and adding another layer until all the slices are in the pan. Scatter the cranberries over the top.

Return the pan to medium-low heat and bring the liquid to a simmer.  Peek under the fruit or listen for the bubbling if you cannot see it. Cover and cook for 5 minutes. Uncover and cook, gently tilting the pan occasionally, until the sauce becomes a thicken and caramelly, 7 to 10 minutes. Remove from the heat.

Roll the dough between sheets of parchment or wax paper into a 12-inch circle. Peel off the top sheet and invert the dough over the fruit. Peel off the remaining paper. Quickly tuck the edges of the crust down into the sides of the pan. Prick the top with a fork. 

Bake in the preheated oven until the crust just begins to brown around the edges, 30 to 35 minutes. Let cool for 15 minutes. Run a knife around the edge of the pan to release the crust then place a serving plate larger than the pan on top and invert the tart onto the plate. Serve warm.

My notes: I used King Arthur White Whole Wheat Flour for the crust and used a seasoned 8" cast iron skillet for the tart. While there was a little too much dough, the filling ingredients were just about right.  I did need to add another half apple.  Perhaps mine were a little smaller.

Adapted from Eating Well.com

Saturday, September 27, 2014

Apple and Cheese Turnovers


My first official dessert of autumn!  I knew it had to be something with apples.  Apple and spice and every nice, you know.  An absolute must at this time of year.


What is your favorite kind of apple?  I love an apple that is sweet and juicy and has a lot of crunch.  I usually pick Fuji, Braeburn or Honey Crisp.  I still haven't tried the new Sweet Tango yet.  I was thrilled to see organic Honey Crisp apples at the market this week.  I do try my best to avoid the "Dirty Dozen".


These little turnovers, or hand pies as people like to call them now,  are made with store bought puff pastry, a perfect example of easy and delicious!  With the addition of Farmers' Cheese, they become a tasty twist on a blintz.
 

This was the first time I had baked with Farmers' Cheese (dry curd).  It tastes like a cross between cream cheese and ricotta cheese, flavor and texture-wise so don't be put off by the itsy-bitsy curds in the filling.  It tastes delicious! 


The original recipe calls for 1 lb (or 2 sheets of puff pastry). If you use only one sheet of puff pastry you can make six turnovers, which I did for just my husband and myself.  I'm going try and freeze a couple to reheat on Sunday morning. They would make perfect picnic food for a trip to a park or to the country to see the fall colors.


My husband and I recently returned from attending a wedding near Atlanta, Georgia for the daughter of very good friends.  While there, we did some sight-seeing in and around Atlanta.  One of the most impressive of the places we visited was The Atlanta Botanical Gardens. Those of you who have followed me for a while know that I am an avid gardener.  The living sculptures at the Atlanta Botanical Gardens were just amazing and are so well maintained and beautiful.  Here are just a few of the many photos I took.  


At the top is the Earth Goddess.  She is 25 feet tall and a waterfall flows from her hand.  Her tresses are real plants and are tended to and changed regularly. Below her are a gorilla and cobra, both made with living plants and 10-20 feet tall.  There are many more amazing living sculptures like this throughout the gardens. I highly recommend a visit to the Atlanta Botanical Garden.

Apple and Cheese Turnovers

Adapted from Food and Wine
Printable Recipe

SERVINGS: makes 12 hand pies (can be easily halved by using only 1 sheet of puff pastry - roll out to 8 x 12 and cut 6 squares)

These turnovers or hand pies have a filling that combines tart and sweet apples with farmer cheese and cinnamon.

1 1/2 tablespoons all-purpose flour, plus more for dusting
1 pound puff pastry (2 sheets)
2 Honey Crisp apples, or apples of your choise, coarsely grated (I used the large holes on a box grater)
3 tablespoons sugar, plus more for dusting
1/2 cup farmer cheese (most well-stocked stores carry it in tubs).  See Note*
1/8 teaspoon cinnamon
1/8 teaspoon nutmeg (optional - my addition)
Pinch of salt
1 large egg, beaten

On a lightly floured work surface, roll out the pastry into 2 8 x 12 rectangles and cut out twelve (6 per sheet) 4-inch squares. Transfer the squares to a baking sheet and freeze until firm, 10 minutes. In a bowl, toss the apples with the sugar, farmer cheese, cinnamon, salt and 1 1/2 tablespoons of flour.

Preheat the oven to 375°. Line 2 baking sheets with parchment paper. Brush the edges of the squares with the egg and mound 2 tablespoons of the apple filling on each one. Fold to form triangles and press to seal. Freeze until firm, about 15 minutes.

Using a fork, crimp the edges of the triangles. Brush the tops with egg and sprinkle with sugar. Cut 3 small slits in each to release steam. Bake until golden and crisp, about 30 minutes, shifting the pans front to back halfway through. Let cool, then serve.

*I've read that you can use small curd cottage cheese in place of Farmers Cheese.  Just drain it very well and then pulse it in a food processor for a creamier texture. 

Thursday, July 25, 2013

Rhubarb-Strawberry Hand Pies


I am the Proud Mama of a grown up rhubarb patch!  I planted it with no idea how to grow rhubarb and little did I know that there are RULES!  

The following spring after the rhubarb crown plant is planted, do not pick any rhubarb.  The following season after that, you may harvest just a very few stalks  (I actually left mine alone year two also, just to make sure it would be healthy).  The third year of growth you may finally take a full harvest - although leave at least one-third of the plant after each harvest to regenerate new growth.  Be sure to cut off any flower stalks that grow! After the last harvest, in early July, allow the plants to grow without picking any more stalks until killed by frost in the fall.  

Do you think I was ready after three years to have some rhubarb?  Oh yes! The very first thing I made were these rhubarb-strawberry hand pies.


Here is my little rhubarb patch. My rhubarb was very happy this year and I and have large bags of cut rhubarb in my freezer from my harvesting so I can continue to enjoy rhubarb sauce or these delicious rhubarb hand pies when the mood strikes.


I found the recipe for the hand pies here but I didn't care for the pastry crust in that recipe when I first made them.  Then I saw a recipe for King Arthur Flour's hand pie crust and gave the hand pies another try and it  was perfection.

I had never made hand pies before.  I love the single serving size and, obviously, being able to eat with your hands. Perfect for big and little boys or girls and picnics in the back yard :)

Feel free to substitute your favorite pie filling if you don't care for rhubarb!

Garden Update ~  Day lily time!  My favorite melon yellow day lily was a gift from a garden forum friend Kim, in Canada who even got all of the necessary horticulture certificates to send it to me years ago.  If you look closely, you can see my rhubarb patch from the other side of the fence :)  Summer's bounty - never ceases to thrill me.


Rhubarb-Strawberry Hand Pies

Strawberry-Rhubarb Hand Pies
Adapted from Bay Area Bites and King Arthur Flour

Yield – 8 hand pies

Pastry 

2 cups unbleached flour
1/2 teaspoon salt
1/2 teaspoon baking powder
1 cup cold unsalted butter
1/2 cup cold sour cream

To make the dough: Whisk together the flour, salt, and baking powder. Add the butter, working it in to make a coarse/crumbly mixture. Leave most of the butter in large, pea-sized pieces.

Stir in the sour cream; the dough won't be cohesive. Turn it out onto a floured work surface, and bring it together with a few quick kneads.

Pat the dough into a rough log, and roll it into an 8" x 10" rectangle. Dust both sides of the dough with flour, and starting with a shorter end, fold it in three like a business letter. Flip the dough over, give it a 90° turn on your work surface, and roll it again into an 8" x 10" rectangle. Fold it in three again.

Wrap the dough, and chill for at least 30 minutes before using.

Filling:

2 cups fresh strawberries, hulled and quartered
2 cups rhubarb, washed, trimmed and cut into ½ inch pieces (about 3-4 stalks of rhubarb)
1/4 cup granulated sugar
2 tablespoons honey
1 tablespoon cornstarch

For Finishing:

1 large egg (whisked with 1 Tablespoon of cold water)
3 tablespoons coarse sugar

In a large, heavy saucepan, combine the strawberries, rhubarb, sugar, honey and cornstarch and stir to mix well. Place over medium heat and cook until thickened and bubbly, stirring frequently, about 5 to 10 minutes. Remove from heat, cover and chill along with dough until ready to use.

To assemble and bake:

Preheat the oven to 425 F.

Roll the chilled dough into a 14″ x 14″ square, and cut it into 16 squares, about 3 1/2″ each. Cut the centers out of eight of the pieces (I used the tip of a small funnel).

Place generous tablespoons of filling on the remaining 8 squares. Spread the filling out a bit, but leave a good 1/2″ border for sealing the pies. Brush the border with some of the egg wash – or use your finger to spread it around the edge. Place the cut out square over the top and press around the border. Use a fork to crimp and seal.

Brush the top of each pie with egg wash and sprinkle with coarse sanding sugar.

Bake for about 12-15 minutes – depending on your oven – start checking after 10 minutes. Remove with the pies are golden brown on top. 

Thursday, May 3, 2012

Lemon Tart with Chocolate Almond Crust


This is a recipe that I posted early in 2009 but is so good that it deserves a second post.

I've made this recipe a number of times and highly recommend it!  The lemon curd is amazingly creamy and so delicious! This is a tart that will satisfy both the lemon and chocolate lovers out there (I am both).  I added some lemon zest to the recipe for an extra lemon boost. Everyone LOVES it! 

The crust is like eating chocolate sable cookies.  In fact, I had some crust left over that I rolled into a log, wrapped in plastic and refrigerated, sliced and baked into cookies!

Shop 8 and 9 inch tart/quiche pans like mine HERE(Affiliate Link) 


Lemon Tart with Chocolate Almond Crust

Adapted from Food and Wine
Printable Recipe

I used a tart pan which measures 7 inches across the bottom, 8 inches across the top with 1-1/2 inch sides. If your tart pan only has 1" sides, I suggest using a 9 inch tart pan.  

This lemon tart satisfies both the lemon lovers and chocolate lovers!

Makes 1 tart and serves 5-6

CHOCOLATE PASTRY

3/4 cups all-purpose flour
6 tablespoons of almond flour*
1/4 cup plus 1-1/2 tablespoons sugar
3 tablespoons cocoa powder
Pinch of salt
6 tablespoons cold unsalted butter, cut into cubes
1/2  large egg (whisk together and measure 2 tablespoons)

LEMON CURD

1 cup plus 2 tablespoons sugar
3/4 cup fresh lemon juice
8 large egg yolks
1 large egg
1-1/2 sticks unsalted butter, softened
Bittersweet chocolate shavings, for garnish

In a food processor, combine the all-purpose flour, almond flour, sugar, cocoa and salt; pulse to blend. Add the butter; pulse until the mixture resembles coarse meal. Add the egg; process until the dough just comes together. Turn the dough out onto a sheet of plastic, flatten into a disk and chill for 30 minutes.

Preheat the oven to 350°. Butter an 7-inch fluted tart pan with a removable bottom. On a lightly floured work surface, roll the pastry out to a 14-inch round 1/4 inch thick. Fit the pastry into the tart pan, patting in with your fingers to level it. Run a rolling pin across the rim of the pan to cut off any overhanging dough. Tears may be patched with scraps. Line the pastry with a piece of foil cut to fit the bottom and fill with pie weights or dried beans.

Bake in the center of the oven for 30 minutes, or until the crust is nearly dry. Remove the foil and pie weights and bake the crust for 15 minutes longer, or until firm. Let cool.

In a medium saucepan, combine 1/2 cup plus 1 tablespoon of the sugar with the lemon juice and bring to a simmer, stirring until the sugar dissolves. In another medium bowl, beat the egg yolks with the whole egg and the remaining 1/2 cup plus 1 tablespoon of sugar. Pour half of the hot lemon syrup slowly into the egg mixture while whisking rapidly. Add the combined mixture back into the saucepan with the rest of the lemon-sugar mixture and cook over moderate heat, stirring constantly, until the curd just comes to a boil, about 9 minutes; it should be the consistency of sour cream. If the curd has any lumps you can strain the curd through the sieve.

Preheat the oven to 300 while the lemon curd cools to room temperature, then whisk in the softened butter until the curd is light and fluffy. Add the lemon zest and mix thoroughly.

Pour the curd into the crust and bake for 20 minutes, or until set. Cool tart on a wire rack, then refrigerate until chilled. Unmold the tart and garnish it with chocolate shavings.

The baked tart can be refrigerated overnight.

*Almond flour is available at specialty markets. Or, finely grind 3/4 cup (3 ounces) of blanched almonds which is what I did.

My Note: I have reduced the original crust recipe by half since the original called for an 11" tart pan. However, the lemon curd proportions remains the same and it fills a 7-inch bottom tart pan with 1-1/2 inch sides perfectly.  If your tart pan has 1-inch sides, I suggest moving up to a 9" tart pan.

If you have left-over crust, roll it into a log, wrap in plastic wrap and refrigerate for at least an hour.  Cut into slices, place on a parchment or silicone mat-lined baking sheet and bake for 9-11 minutes at 375.  Yum!

Sunday, January 22, 2012

Quiche Maraîchère For National Pie Day


National Pie Day is January 23rd and instead of a pie in the traditional sense, I'd like to share a quiche recipe with you. Quiche is a savory pie, after all!

This one is from Dorie Greenspan's Around My French Table Cookbook which is filled with wonderful recipes.  I found the recipe on several...other... websites,  so I hope Dorie doesn't mind that I'm sharing it here.

I brought this quiche to a New Year's Eve party as an appetizer and I received lots of compliments on it!  It was so delicious, I made it again for my husband and myself for dinner with a simple side salad.


First the pie/tart crust is baked then heaped full of delicious sautéed vegetables - a mirepoix of sorts. Then, it's filled with an egg and cream mixture and baked.  At first I was surprised at how little egg is actually in the mixture but went ahead with the recipe as written at it turned out perfectly.. Rather than Dorie's recipe for tart dough, I used my own Flaky, Tender No-Fail pie crust recipe that I got long ago from a friend,  but you can find Dorie's tart shell recipe on one of the sites I referred to above or simply use your favorite recipe for pie crust.


After the filling is baked, a layer of grated Gruyère cheese is added to the top and then returned to the oven to melt to a golden brown.  Now that's my kind of pie!


Quiche Maraîchère
Adapted from Around My French Table by Dorie Greenspan
Printable Recipe

1 tablespoon unsalted butter
2-3 celery stalks, trimmed and cut into a small dice
2 leeks, white and light green parts only, quartered lengthwise, washed, and thinly sliced
2-3 carrots, trimmed, peeled, and finely diced
1 medium red bell pepper, cored, seeded, and finely diced
salt and pepper
1 9-inch tart or pie shell partially baked and cooled (watch careful that your crust doesn't contain any cracks or the filling will ooze out. Add a scrap of pastry to the crack and bake a little longer, if necessary)

2/3 cup heavy cream
1 large egg
1 large egg yolk
2/3 cup grated cheese, preferably Gruyère

Melt the butter in a large skillet over medium heat. Add the diced vegetables and saute for about 10 minutes, stirring occasionally, just until barely tender. Season with salt and pepper, then remove the vegetables to a bowl and let cool.

Center a rack in the oven and preheat to 400 F degrees. Put the crust on a baking sheet lined with parchment paper. Spoon the vegetables into the tart shell and even them out. They should almost fill the crust. Whisk the the cream, egg, egg yolk together, season with salt and pepper, and carefully pour over the vegetables. Depending on how your crust and filling, you may have too much custard. Pour in as much custard as you can without it overflowing and wait a few minutes until it has settled, then add more if you can. Very carefully slide the baking sheet into the oven.

Bake the quiche for 20 minutes. Sprinkle the cheese over the top and bake for another 5 or 10 minutes, or until the cheese is golden (the filling should be puffed all over - especially the center), browned, and set. Note: This took a little longer in my oven.

Transfer the quiche to a rack, remove the sides of the pan, and cool until it is only just warm or until it reaches room temperature before serving.
   
Always Flaky and Tender No-Fail Pie Crust
Printable Recipe

This recipe makes enough crust for 1 single crust pie and 1 double-crust pie (3 crusts) and is easily cut in half or even thirds if you care to do the math.  You never have to worry about over-working this pie crust dough - it turns out beautifully flaky every time.

4  cups all-purpose flour
1  Tablespoon sugar
2  teaspoons salt

1-3/4 cups cold shortening

½ cup ice water
1 Tablespoon vinegar
1 large egg

Stir together flour, sugar and salt. Cut in shortening. Mix liquid ingredients together and stir into flour mixture. Divide into 3 portions and cover with plastic wrap and refrigerate for at least 30 minutes.

Roll out on a well-floured surface.

Save scraps to fill any cracks in the crust, if they develop while baking.

Sunday, February 6, 2011

Lemon Tart with Chocolate Almond Crust


The recipe for my Lemon Tart with Chocolate Almond Crust is from the January 2003 issue of Food and Wine.  I didn't save the magazine but I did scan the recipe.


The chocolate almond crust is delicious with lemon! Two of my favorite dessert food groups :-)  This time, I chose not to use the lemon filling called for in this recipe but used a different favorite filling from my Very Lemon-y Tart recipe. 


It's a delicious blast of lemon flavor with the zest and juice of 5 lemons!  I made one large tart to take to the party later and one little tart for my husband and I to enjoy the next two days. I made another half recipe of the lemon filling and it was just the right amount for one large and one small tart.


This tart can be garnished so many ways, with shaved chocolate as suggested in the recipe or as I'm planning on serving it as you see it above with a dollop of fresh, whipped cream and also some kiwi fruit sliced in the shape of footballs ;)


Lemon Tart with Chocolate Almond Crust
Adapted from the January, 2003 issue of Food & Wine Magazine
Printable Recipe

Makes one 11-inch tart and one 7-inch tart. You could also use the extra chocolate pastry to make about 12 rolled cookies.

CHOCOLATE PASTRY

1 1/2 cups all-purpose flour
3/4 cup almond flour (I finely ground 3-oz of blanched almonds)
1/2 cup plus 3 tablespoons sugar
6 tablespoons cocoa powder
Pinch of salt
1 1/2 sticks cold unsalted butter, cut into cubes
1 large egg

LEMON CURD (for the above tart I used this lemon filling recipe instead of the one shown here)

1 cup plus 2 tablespoons sugar
3/4 cup fresh lemon juice
8 large egg yolks
1 large egg
1 1/2 sticks unsalted butter, softened
Bittersweet chocolate shavings, for garnish

MAKE THE CHOCOLATE PASTRY: In a food processor, combine the all-purpose flour, almond flour, sugar, cocoa and salt; pulse to blend. Add the butter; pulse until the mixture resembles coarse meal. Add the egg; process until the dough just comes together. Turn the dough out onto a sheet of plastic, flatten into a disk and chill for 30 minutes.

Preheat the oven to 350°. Butter an 11-inch fluted tart pan with a removable bottom. On a lightly floured work surface, roll the pastry out to a 14-inch round 1/4 inch thick. Fit the pastry into the tart pan. Run the rolling pin across the rim of the pan to cut off any overhanging dough. Patch any tears in the pastry with scraps. Line the pastry with foil and fill with pie weights or dried beans. Bake in the center of the oven for 30 minutes, or until the crust is nearly dry. Remove the foil and bake the crust for 15 minutes longer, or until firm. Let cool. Lower the oven temperature to 300°.

MEANWHILE, MAKE THE LEMON CURD: Set a fine sieve over a medium bowl. In a medium saucepan, combine 1/2 cup plus 1 tablespoon of the sugar with the lemon juice and bring to a simmer, stirring until the sugar dissolves. In another medium bowl, beat the egg yolks with the whole egg and the remaining 1/2 cup plus 1 tablespoon of sugar. Whisk half of the hot lemon syrup into the egg mixture; add the mixture to the saucepan and cook over moderate heat, stirring constantly, until the curd just comes to a boil, about 3 minutes; it should be the consistency of sour cream. Strain the curd through the fine sieve and let cool to room temperature, then whisk in the softened butter until the curd is light and fluffy.

Pour the curd into the crust and bake for 20 minutes, or just until set. Cool the tart on a wire rack, then refrigerate until chilled. Unmold the tart and garnish it with chocolate shavings. Transfer the tart to a large plate and serve.

MAKE AHEAD The baked tart can be refrigerated overnight.