Showing posts with label madeleines. Show all posts

Friday, February 12, 2021

Madeleines à la Monique


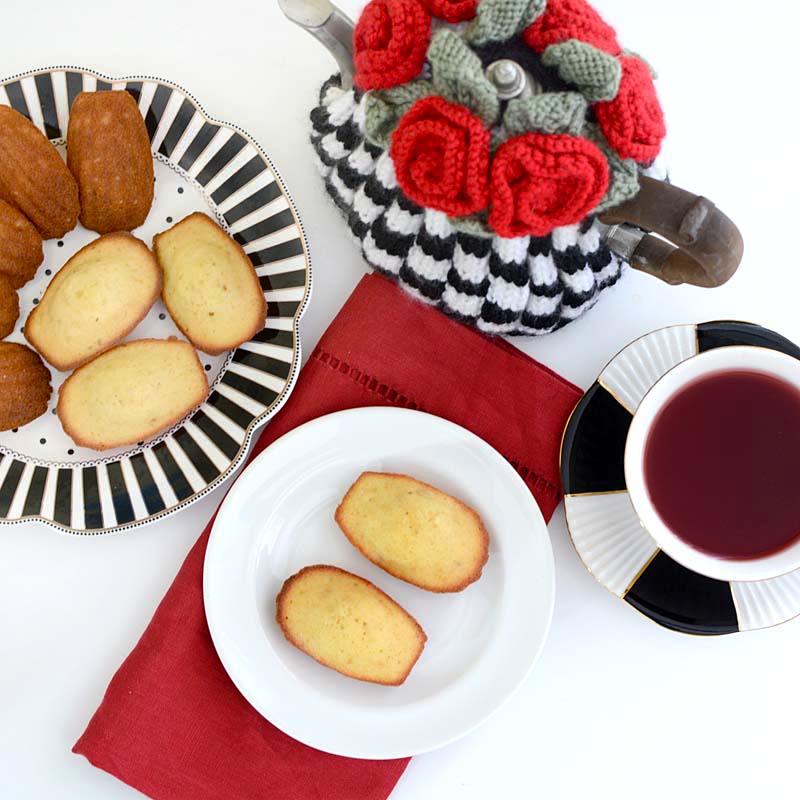
It's always so exciting to try a recipe that turns out just as you had hoped it would!  This is the first time I have made perfect Madeleines, that is, Madeleines with the high 'bump' in the middle which means you have arrived at the pinnacle of perfect Madeleine baking.  Madeleines are simple little cakes and you probably have all the ingredients in your home right now.  

Last fall, my friend Monique, at La Table De Nana, shared the perfect Madeleine recipe along with links that detailed the proper way to make them. There were so many suggestions on the proper oven temperature from many famous chefs!  Which one to try?  I had to confess, the first batch I almost burned, but try, try again, and I found the best temperature for my oven! 

Tip number one, I found out, is to prepare the dough the day before and refrigerate it for at least 12 hours.  


Tip number two is to brush melted butter in each cavity of your pan and then refrigerate until the butter has solidified.  


Tip number 3... after filling the each cavity of the pan 3/4 full, refrigerate for at least 15 minutes while the oven is preheating. 


Tip number 4, bake them first at high heat and then reduce the heat for rest of the baking time. This 'cold dough/hot oven' technique will assure a cripsy crust around the edges and the the perfect 'bump' on the top of each Madeleine.  

I loved them without any powdered sugar or extra sweetness but Monique also shared a link on how to coat one side with melted chocolate.  I'm going to try that next time!

No Madeleine pan? No problem! You can use a mini muffin tin.  Just fill whatever cavity you use 3/4 full. My Madeleine pan is a metal, non stick pan similar to this one, but it's still important to brush the inside of each cavity with melted butter to get the nice browned edges and bottom. Madeleines are perfect with a cup of tea or any time of day snack.  I enjoyed mine with my new favorite Rishi Tea's Hibiscus and Blueberry tea...I local company I like to support.  


Wishing all of you Lovelies a Very Happy Valentine's Day! 

Madeleines à la Monique

Note:  Yesterday when I first published this the 120 grams of flour was listed twice.  I've since edited the recipe.  

This recipe yields approximately 1-1/2 dozen Madeleines,

2 small eggs, weighed in grams. If eggs weigh 120 grams then use…
120 grams of sugar (I reduced that slightly)
120 grams of flour
120 grams of butter, melted
1 tsp honey
½ tsp baking powder
¼ tsp salt
1-1/2 teaspoons orange zest (or lemon) or sub vanilla.  I used dried orange peel.

Grate the zest one organic lemon or orange, if using.  In a small bowl mix the zest of the two lemons with the sugar. In other bowl, sift the flour and the baking powder. In a small saucepan melt the butter.

Beat the eggs together with the lemon zest, sugar and the honey until the mix becomes a bit foamy. Next add the flour-baking powder mix and whisk. Finally add the melted butter and mix until well incorporated.

Refrigerate overnight or at least 12 hours with plastic wrap touching the top of the dough so it doesn't dry out.

The next day, melt a small pat of  butter and, with a pastry brush, brush the insides of the Madeleine molds. Place the molds in the refrigerator for 15 min until the butter firms. Sprinkle flour and remove the excess (only for non stick pans).  Fill molds to ¾ full with a heaping tbsp of dough. Spread out dough in molds using the pastry brush to gently tap dough into mold.  Refrigerate again while oven is preheating, at least 15 minutes.

Preheat the oven to 420 F).  Bake them for 3 minutes and reduce heat to 320 F and bake for another 4 minutes.  Timing will depend on your individual oven.  Check often during last few minutes.  Madeleines should not be shiny on top with a nice ‘bump’ and be golden with browned edges.  Let the Madeleine’s cool before removing them from the mold.

Leave plain or dust with confectioners sugar or dip in melted chocolate. 

Savoring Time in the Kitchen is a member of the Amazon Affiliate Program. If you purchase a product by following a link that we provide, the price you pay as a consumer does not change, but if you do make a purchase through one of these links, we earn a very small commission for providing that link.  Thank you for your support of Savoring Time in the Kitchen!

Sunday, December 19, 2010

Santa Madeleines

I am a horrible cookie decorator! I keep thinking one day a miracle will happen and I will finally get it. The fact is, I actually prefer most desserts unfrosted. A little sprinkle of sugar on top of a cookie is just fine with me...or a drizzle of good chocolate.


However, when I saw these Santa Madeleines, I thought they were so adorable that I'd give them a try. Unfortunately, I thought the frosting recipe was very hard to work with (couldn't have been me) and I didn't care for the taste of it either.


The Madeleines themselves were wonderful!  I used the 'optional' crushed anise seed and it added a delightful yet subtle flavor to these dainty little cakes.  I will be making this recipe again.


I do love Santas - but only the ones I don't have to decorate myself :)


Madeleines (Plain or Santa - You Decide)

Adapted from Better Homes and Gardens
Printable Recipe

3/4 cup all-purpose flour
1/4 teaspoon baking powder
1 egg
2 egg yolks
1 cup sifted powdered sugar
1/2 cup butter, melted and cooled
2 teaspoons finely shredded orange peel
2 teaspoons orange juice
1/2 teaspoon anise seed, crushed (optional)

1 recipe Decorator Frosting (see recipe below) or 2 cans vanilla frosting
Red, blue, green, pink, and/or black paste food coloring
Small round candies (optional)

Grease and flour twenty-four 3-inch madeleine molds; set aside. Stir together flour and baking powder; set aside.

In a medium mixing bowl beat egg and egg yolks with an electric mixer on high speed 5 minutes or until thick and lemon colored. Add powdered sugar; beat on low speed until combined, then on high speed about 5 minutes more or until very thick and satiny. Beat in butter with an electric mixer on low speed. Add flour mixture, beating at low speed until combined. Stir in orange peel, orange juice, and, if using, anise seed. Carefully spoon batter into the prepared molds, filling each three-fourths full.

Bake in a 375 degree F oven about 10 minutes or until edges are golden and tops spring back. Cool in molds on rack 1 minute. Loosen cookies with a knife. Invert cookies onto a rack and cool completely.

Divide frosting, leaving about half of it white; color one-third with red and/or pink food coloring and remaining with green, black, and/or blue food coloring.

To decorate, fill a decorating bag fitted with a small star tip with white frosting. Pipe on hat trim at an angle about a third of the way down from narrow end of cookie. Fill decorating bag fitted with a small star tip or plain tip with red or pink frosting; pipe on hat. With white frosting, pipe on mustache, beard, and pom-pom hat. Fill decorating bag fitted with a small round tip with green, black, or blue frosting; pipe on eyes. Using red frosting, pipe on mouth. Pipe on other frosting decorations. (Or, use small round candies for eyes, nose, mouth, and cheeks, attaching them with frosting.) Wrap cookies tightly to store. Makes 24 cookies.